" width="2000.6830131107324px"/></svg>)
WHAT IS RISOGRAPH?
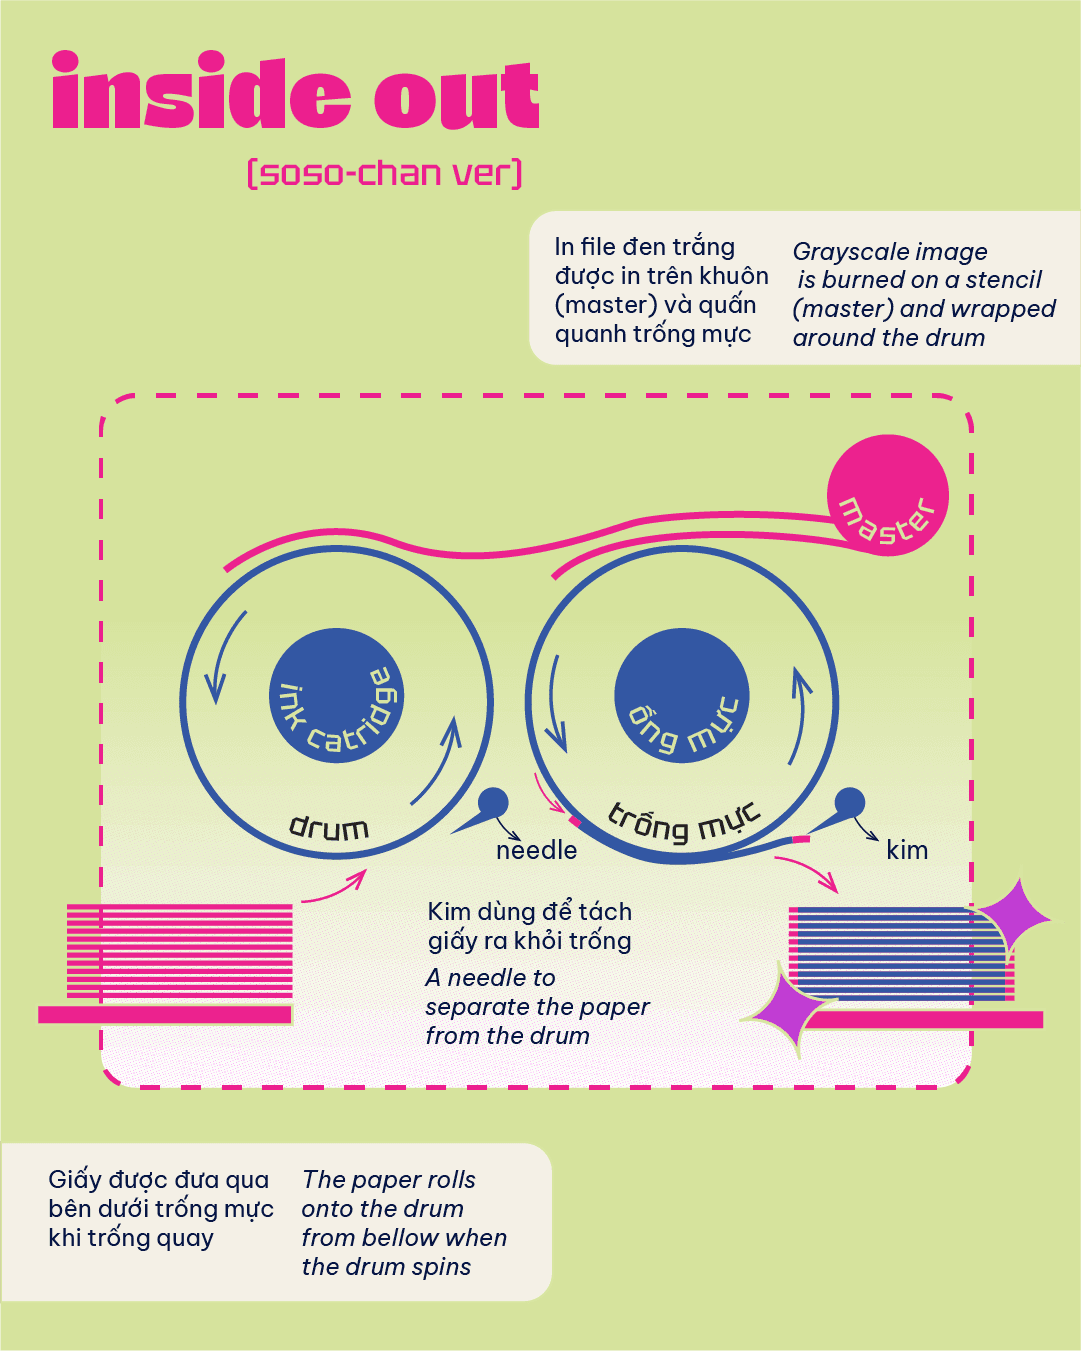
If you have heard about the screen-printing method then Risograph is the special combination of the layer-on-layer process of screen printing and photocopy mechanism from the usual office photocopy. Each colour is a different stencil, separating each colour then layering them on the sheet of paper.
*Riso is short for Risograph, a printer/ printing process from Japan.
RISOGRAPH (RISO) is a sustainable printing method.
Unlike others printing methods that rely on heat, Riso machines utilize a "cold" printing process - helping reduce energy usage- by up to 91% in some cases. Riso inks are soy-based (non-toxic) and the stencils are made from plant fibers, making the entire process biodegradable, free from petroleum-derived chemicals, and safer for both users and the environment.
We also use FSC-certified paper and make an effort to reduce waste by upcycling test prints and leftover materials whenever possible.
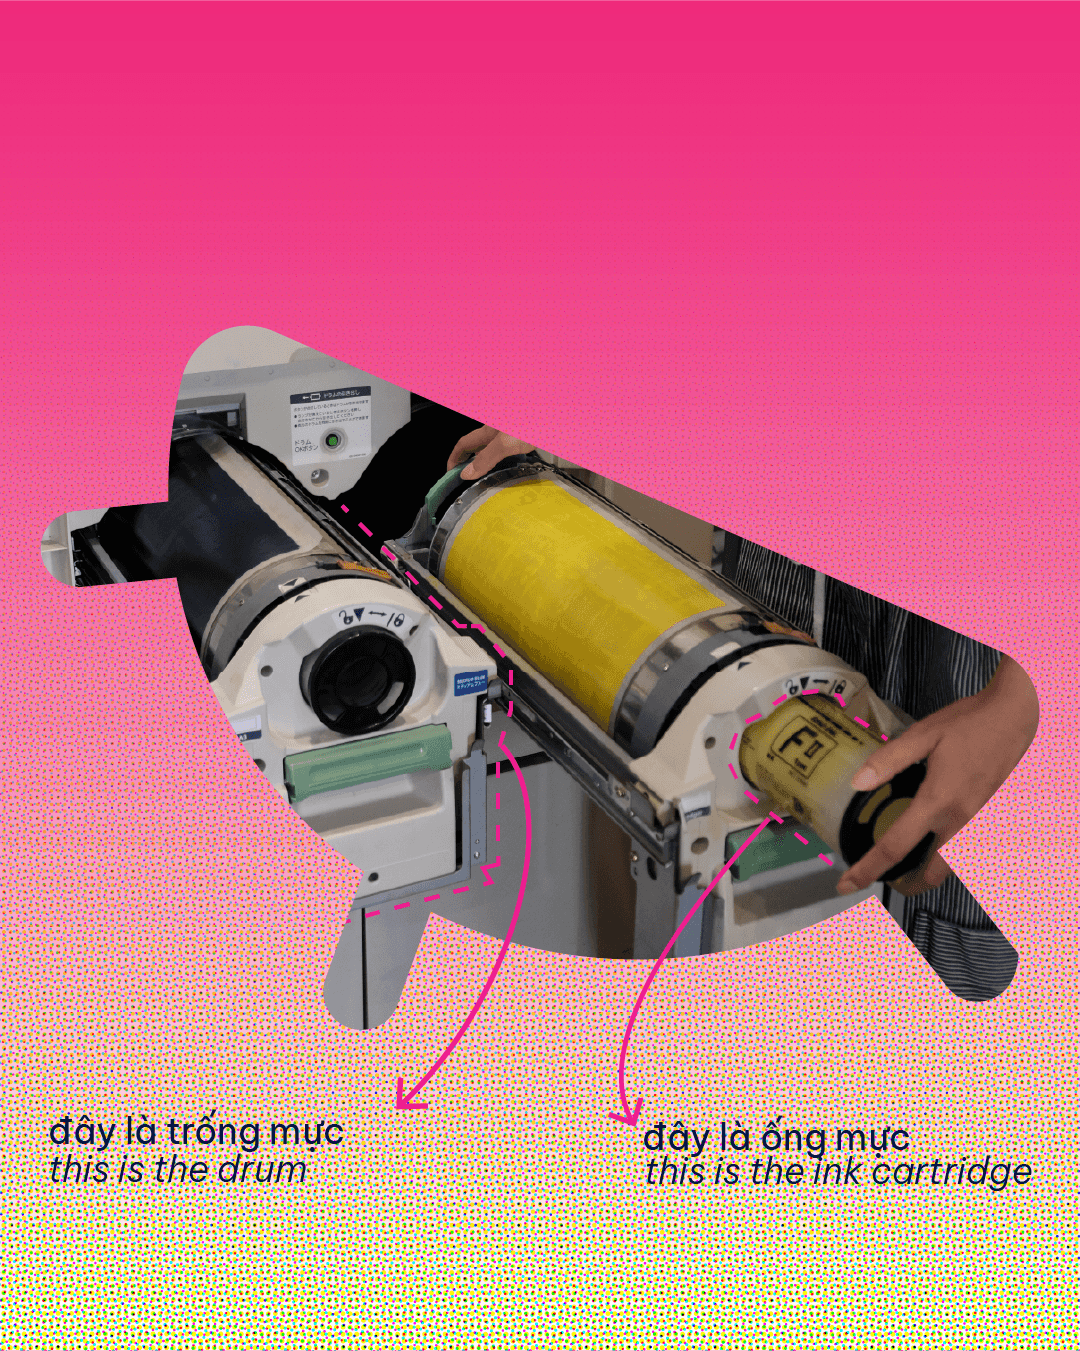
HOW RISOGRAPH WORKS?
THE QUIRK OF RISOGRAPH
If this is your first time printing with Riso, the imperfections and ink beha-vior are the main things to keep in mind - because they’re exactly what make each print unique. While Riso prints are never perfectly precise, they offer a softness and vibrancy that digital printing can’t replicate.
You can create single-color to five-color prints - but the more colors you use, the higher the cost, since each color layer requires a separate master (printing stencil).
Because the ink is soy-based and dries slowly, it might smudge a little if you touch it too soon.
The colors are layered one by one, so they don’t always line up perfectly -which creates those slightly off, but super charming misregistrations.
And since each sheet goes through the machine separately, every print can shift just a bit from the last one - only a few millimeters, but enough to make each piece feel a little different.
These quirks are what give RISO its unique, "half-hand craft" vibe.
PAPER & PRINTABLE AREA
RISO ink works best on most uncoated papers, as it can absorb into the surface and dry properly (unlike coated or tracing paper).
The ideal paper weight that Soso-chan can handle is between 46gsm and 210gsm. We can still use paper outside of this range, as long as the ink coverage is kept low.
The maximum printable area is 413×291mm. With a 10mm bleed on each edge, your design file should be sized at 393×2713mm.
PREPARE YOUR RISO FILE
For print, artwork files should be:
Flattened PDF (no layers or transparencies)
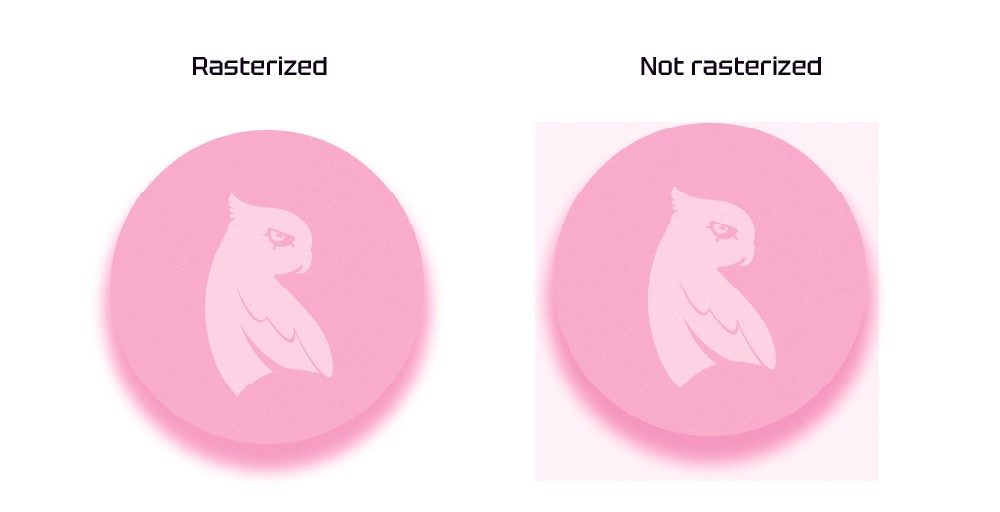
Note: If your artwork includes effects like drop shadows, the RISO machine may interpret them incorrectly, often resulting in visible boxes or glitches in the final print. To avoid this, please make sure these elements are flattened and rasterized before printing.
Set to Greyscale / B&W
Since the RISO machine reads from black-and-white files, please make sure of the following:
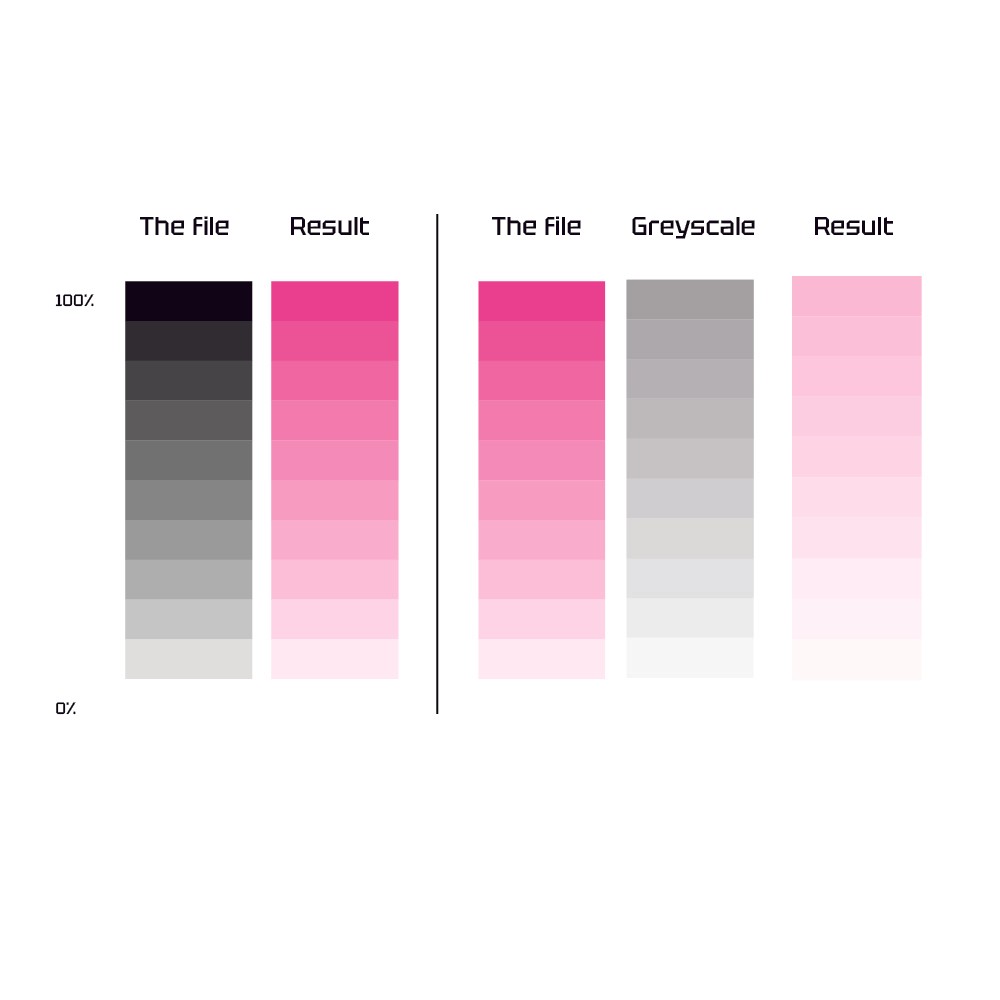
Ensure your tonal value range is accurate - don’t just convert your artwork to greyscale. The darkest areas should represent the most saturated ink, and lighter areas should print lighter accordingly.
Clean up your file – scanned or textured artwork may contain blur or noise. Make sure white areas are 100% white to avoid unintended grain/area when printing.
Resolution: 300 DPI & Size: A3
The maximum printable area is 413×291mm. With a 10mm bleed on each edge, your design file should be sized at 393×2713mm.
Save each color layer as a separate file & label each file
Please save each color layer as a separate file, and kindly label them clearly, for example: artworkname_fluopink.pdf.
Please fill you information here for a specific quote.
COLOR SEPERATE METHOD
When preparing artwork for Risograph printing, your colors need to be converted into separate layers suitable for the limited RISO inks. Here are some common methods:
Faux CMYK
What it is: Simulates CMYK channels using the RISO inks you have.
Why use it: This produces colours as close as possible to your original artwork.
Tips: Adjust grayscale layers to control ink density, and test to ensure accuracy.
How to do:
Convert your artwork into CMYK
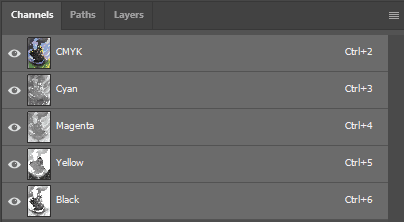
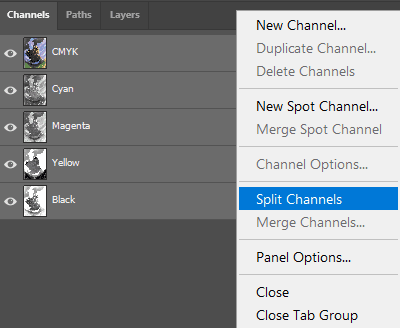
Separate each channel (C, M, Y, K) into individual grayscale layers. You can simply select Split Channel
Assign each layer to a RISO ink colour that best matches the channel.
Then, try testing your file with our file here.
For example, we use Medium for Cyan, Fluorescent Pink or Red for Magenta, Yellow for Yellow, and Black for Key.
Convert to CMYK Mode
Split Channels to separate each color into its own file. Then, export it to PDF and name the files clearly.
Testing on our file
Testing using multichannel
Duotone/ Tritone/ Multitone
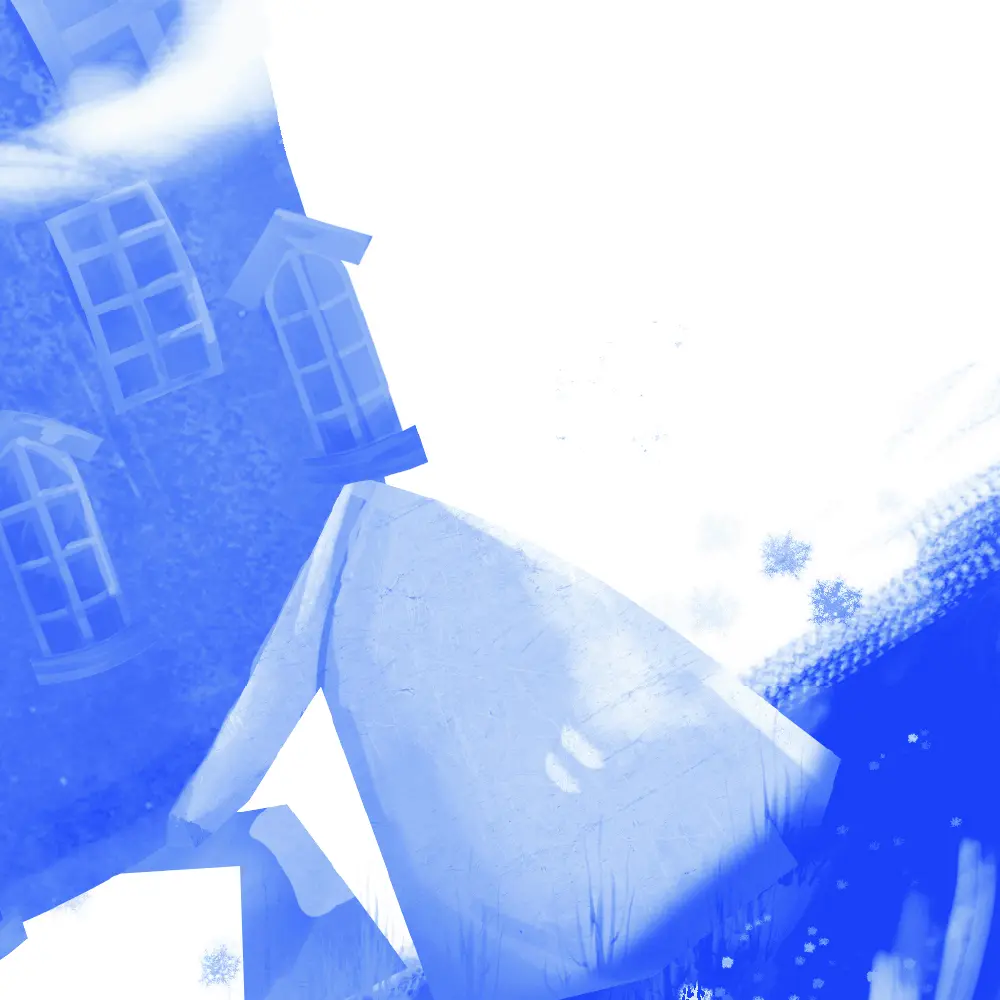
What it is: A method to reduce a full-colour or CMYK image into 2, 3, or multiple grayscale channels, which can then be printed with different RISO inks.
Why use it:
Allows creative freedom, giving you the flexibility to assign any colors you like without being limited by the original colour palette.
Allows you to simplify complex colour images while maintaining tonal depth.
How to do:
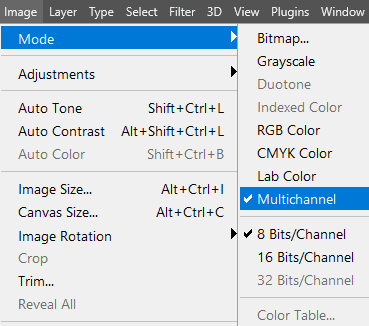
Convert your CMYK channel to Multichannel
Assign each layer to a RISO ink colour that you want.
You can also refer to our swatch palette here to choose your colours.
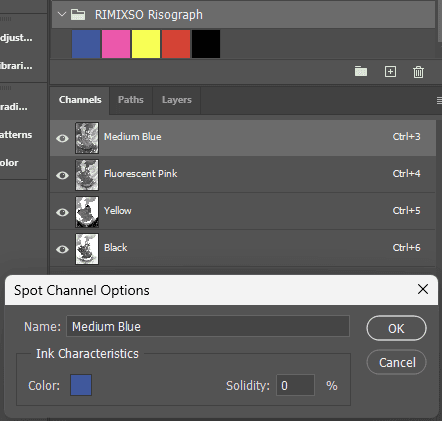
Convert to Multichannel
Double-click the channel, then select a color from the swatches.
PUBLIC RESOURCES
RIMIXSO has put together a set of resources to make it easier for you to prepare and optimize your artwork for Risograph printing, including files you can download and useful links.
Our Resources (included Swatches Colour Palette for Adobe Illustrator and Photoshop, and Colours preview file): Link